Well, here we are again with another campaign update. However, much to my embarrassment, I forgot my camera. How dreadful! However, I am going to give you the post battle results, cause that's the cool stuff. I am unsure how to my blogger make a proper 'tab' to show tables properly. If anyone can tell me a quick simple way, I would be grateful.
The Standings;
Record Win Lose Draw Total Games
Jim 3 3 0 6
Tom 1 6 0 7
LAZ 4 3 0 7
Megan 5 2 0 7
Vs Sheet (wins only)
Jim Tom LAZ Megan
Jim X 2 1 0
Tom 0 X 1 0
LAZ 1 2 X 2
Megan 2 2 1 X
Round 1:
2-3: Tom vs. LAZ (LAZ)
3-1: LAZ vs. Jim (LAZ)
1-2: Jim vs. Tom (Jim)
3-4: LAZ vs. Megan (LAZ)
4-1: Jim vs. Megan (Megan)
2-4: Tom vs. Megan (Megan)
Round Robin: Tom Vs. LAZ Vs. Megan (LAZ win)
Round 2:
3-4: LAZ vs. Megan (Megan)
4-1: Jim vs. Megan (Megan)
2-4: Tom vs. Megan (Megan)
3-1: LAZ vs. Jim (Jim)
2-3: Tom vs. LAZ (Tom!- FIRST WIN!)
1-2: Jim vs. Tom (Jim)
Round 2 Part 3:
Tom WBR: 120 vs. LAZ WBR: 179: skirmish
The Quick Score Sheet:
1. Who Killed Who:
Henchman Thunderer I takes out verminkin
Hero Thunderer takes out verminkin
Pierced tail Night Runner takes out Orange Beard Trollslayer.
Verminkin takes out thunderer with slingshot
Beardling cricital OoA Black Skaven II
White Beard Trollslayer OoA verminkin
Black Skaven I OoA beardling
White Beard OoA curbstomp verminkin
Tom wins when I roll boxcars.
2. Injury Results
Tom: 1 beardling dead
1 thunderer dead
Orange Hair full recovery
Laz: 2 spears dead
1 club dead
pierced tail 34: -1 WS
BS II: 51 full recovery!
3. XP gained:
Tom:
Engineer: 3, total 23
Orange Hair: 2 total 19
White Hair: 4 to 23 total, gets a roll resulting in +1 LD
Hero Thunderer: 3 to 9 total, gets a roll resulting in +1 wound
Beardling: 2, total 9 gets a roll resulting in +1str
Thunderer: 2, total 8
LAZ
Sorceror: 1, total 18
BSI: 2 total 20, gets a roll resulting in a skill Resilient
BSII: 1 total 22
Pierced Tail: 1 total 4 resulting in +1 str
Club henchman group: 1 total 9 resulting in That Lad's Got Talent!
Lad: +1 str
Hench: 6 +1 BS
Spears henchman group: 1 total of 4
4. Exploration results
Tom: 3,3,3,2,6: 4 shards, prisoners; 10 GC
LAZ: 1,3,4: 2 shards
5. Recruiting
Tom: 5XP available for recruitment: 3 shards for 70, thunderer with cross bow (65)
LAZ: 7 XP available for recruitment: exchange 3 shards for 60, 1 verminkin with sword (20, sword from storage), 1 verminkin with spear, sling 4 XP (40)
6. New standings
Tom: 122
LAZ: 174
Tom WBR: 122 vs. Jim WBR 160: Treasure Hunt
1. Who Killed Who?
No One.
Vampire gets the treasure chest: Contents: 9 GC: 1 wyrdstone, suit of light armor, sword, 3 gems worth 10 GC each.
2. Injury Results
None. The only wound taken in this lightning quick match was the vampire from a thunderer, but he still had 2 more wounds left. The dwarves were just too slow for this type of match.
3. XP gained:
Tom: +1 all
Engineer: 1 total of 24 gets a roll resulting in +1 BS
Orange Hair: 1 total of 20 gets a roll resulting in skill- Monster Slayer
White Hair: 1 total of 24 gets a roll resulting in skill- Monster Slayer
Hero Thunderer: 1 total of 10
Beardling: 1 total of 10
Thunderer: 1 total of 9
xbow thunderer: 1 total of 1
Vampire: 4 total of 41 gets a roll resulting in skill- Jump Up
Necro: 1 total of 15
Dreg 1: 1 total of 8 gets a roll resulting in +1 T
Dreg 2: 1 total of 8 gets a roll resulting in +1 T
Dreg 3: 1 total of 9
Hero Ghoul: 1 total of 7
Ghoul Henchman Group: 1 total of 7
4. Exploration results
Tom: 1,3,4,6: 4 shards
Jim: 1,1,3,4,5,6: 4 shards. Well: Dreg 1 rolled six, miss next game.
5. Recruiting:
Tom: 4 XP: turn in 5 shards for 90, another crossbow thunderer for 67
Jim: 5 XP: turn in 5 shards for 70, already at full warband numbers, puts it in the bank.
6. New standings.
Jim: 178
Tom: 134

Saturday, July 30, 2011
Tuesday, July 26, 2011
Monday Night Mordheim; Campaign with Style
Monday Night Mordheim: Campaign...With Style...
Sorry about the delay, I was unfortunately caught up in real world work stuff. I guess that's the real nature of the world, fun stuff always seems to get pushed back.
On with the show! I've been thinking about the various types of campaigns that I've been involved in over the years that I've been playing Mordheim. Some are structured, some are not. All of them have their benefits and their drawbacks. What I want to do is talk about each type of campaign. The good thing is that quite a few of these are good for more campaigns then just Mordheim. If you wanted to run a campaign using say 40K or Maulifaux, then you would not have any trouble doing so with a quick adaption.
Campaign Style 1: Chaos
A chaotic campaign is the simplest of all the campaigns to run. Basically it means having a set time to play, and who ever isn't already playing another player, gets together and plays.
Benefits: Loose, doesn't require a lot of dedication. Zero book keeping.
Drawback: There is a chance that people play each other over and over again, and different warbands can quickly become lopsided.
Campaign Style 2: Tournament Brackets
A tournament bracket campaign is possibly what most people think of when I say campaign. It is the standard double-elimination type of bracket.
Benefits: Structured schedule of matches. Definitive winners and losers. Minimal book keeping.
Drawback: After the second round, you lose a lot of players, and each round after that you continue to lose more- which can be frustrating for people playing late bloomer warbands (like Dwarfs or Possessed).
Campaign Style 3: Round Robin
I personally Round Robin is my favorite for a number of reasons, which I've outlined previously. Round Robin everyone plays everyone.
Benefits: Set schedule of matches. Potential to go forever, allowing even late bloomer warbands to eventually flourish. Everyone plays everyone. Standard book keeping.
Drawbacks: Only works for a dedicated core of players, lossing players can have detrimental effects on a campaign.
Campaign Style 4: Map Based Campaign.
If you didn't think of the either of the tournament styles, you probably thought of the map based campaign. I think that many other games do better with maps then Mordheim, but don't sell it short.
Benefits: This campaign lends itself to narrative scenarios much better then any others. Easy to drop players in and out of the campaign.
Drawbacks: Potential quagmires where the same few players end up playing each other over and over again. High amount of book keeping. Potentially huge mismatch of Warband Ratings can happen if not carefully refereed.
Campaign Style 5: Sports Style
This is a potentially different campaign, which I rather like. I haven't run one myself, and I've mainly seen it with Blood Bowl, but I am willing to say that it would work well for Mordheim as well. The best way to describe it is like a sports season, where there is an initial 'season' where there are scheduled matches and no one gets eliminated, and then it goes to the 'playoffs', in which the top few warbands go through a single elimination tournament to find a final winner.
Benefits: Everyone gets to play everyone, set schedules, set end with final winner.
Drawbacks: Set end. Much book keeping.
Those are what I consider the main styles of campaigns that can be run. There are probably more, and variations of those I've mentioned are probably too numerous to even mention. While I'm done talking about the particular styles of campaigns for now, I think that I'll be talking about the different ways of running campaigns in the future. I think that most of them can be covered in a single post, but I think the map campaign deserves its own special listing.
Saturday, July 23, 2011
Mordheim Campaign Bat Rep: Round 2 Session 2
Round Two Session Two
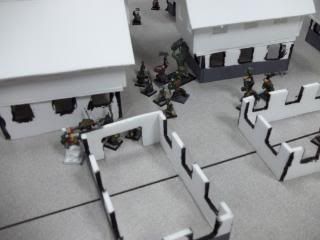
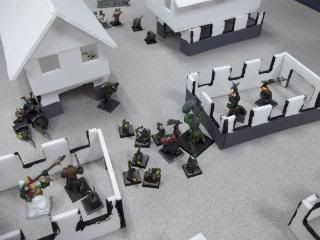
Well, its the first week to play again since we have been busy at work lately. Fortuitously we were able to clear off a slightly larger space then what we have been using, so it makes things a bit more interesting. Not that we pariticularly used that extra space. It was a pretty good couple of games, even though halfway through my game the computer I was using Blue Screen of Deathed me, so I lost all the notes I had for my game. Please forgive the state of these notes, they are just what I jotted down during the match. As for the pics, this time I'm not busting out of the borders here, but I'm not too satisfied with the size. This time I'm thinking that its too small.
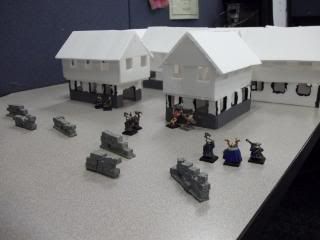
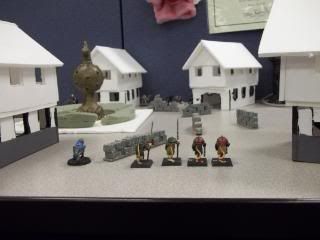
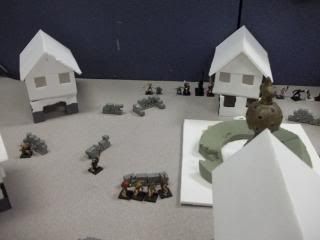
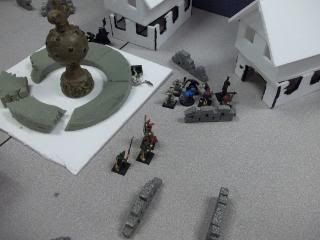
Tom Dwarves(WBR 131) vs. Megan Orcs & Goblins(WBR 200)
Megan's O&G Setup.
Tom's Dwarf Setup.
OT1:
Two gobs fail animosity, one of them stuns a 3rd gob.
DT1:
Move forward
OT2:
Two gobs fail animosity, but do nothing. Move forward
DT2:
Move Forward
OT3:
One gobs fails animosity and WAAGH's. Another goblins grabs a wyrdstone counter.
DT3:
Dwarfs move forward. Engineer fires and hits and wounds goblin, who is knocked down.
OT4:
One gob fails animosity and does nothing. O&G move and fortify themselves.
DT4:
Dwarves move up. Engineer fires and takes out gobbo.
OT5:
One fails animosity does nothing, Big Un 1 grabs wyrdstone.
DT5:
Move, engineer shoots and misses
OT6:
Passed all animosity, one with spear charges Dwarf Noble, one with spear charges thunderer. Shooting: 3 gob archers miss. CC: Gob 1 misses, Dwarf noble criticals and stuns gob. thunderer hits and knocks down.
DT6:
Bit of movement. Shooting. THunderer kills OB, CC: Noble curb stomps gob. Thunderer gets over toughness.
OT7:
OB fails animosity and stands, move forward, shooting: shaman spell suceeds for the very first time on thunderer, 2 fail, 1 hits, and knocks down. one gobbo crits on noble takes him to stunned.
DT7:
recovery, mov up, Shooting: thunderer miss via lucky charm, engineer misses troll
OT8:
charges, Dwarf Noble survives with his 3+ gromril armor and shield, boss takes out already wounded dude, troll knocks down other guy.
DT8:
movement, charges. Shooting: Thunderer shoots big un, does not wound. CC: thunderer vs. gobo does nothing, noble vs shaman nothing.
OT9:
gob that was going to charge failed animosity and fought another gob. troll takes out beardling.
DT10:
orange hair takes out orc boss
OT10
Shaman takes out noble
orange hair takes out gob
II takes out thunderer
I gets a curb stomp
DT10:
needs rout check fails rout.
The Quick Score Sheet:
1. Who Killed Who:
Engineer kills gobbo
Gobbo grabs wyrdstone
Big Un 1 grabs wyrdstone
Noble curb stomps gob
Thunderer kills gob
orange hair takes out orc boss
Shaman takes out noble
orange hair takes out gob
Big Un II takes out thunderer
Big Un I gets a curb stomp
2. Injury Results
Dwarf Noble: snake eyes dead
beardling with hammer is dead
Orc Cheif: full recovery
orc boy dead
2 gobs with spears dead.
3. XP gained.
tom: +2
engineer: 3 (20 total: +1 str)
orange hair: +4 (17 total: 2 rolls, 1 +1 attack, skill)
white hair +2 (15 +1 ws)
thunderers: (that lad's got talent, skill, the other +1WS)
Chieftain: 3: (36: skill)
Shaman: 2 (15: +1 Attack)
BU1: 3 (26)
BU2: 2 (24- skill)
OBS: +1 Ld
4. Exploration results
4432: +1 wyrd dwarf = total of 4 wyrdstone (straggler, get +1 die on next exploration phase)
33224: double 2 shop (6 GC), 3 wyrdstones
5. Recruiting
Tom: 2 XP: thunderer with handgun.
Megan: 7 available
6. New standings.
Tom:
Megan: 203
Tom left early, so I didn't figure out what the new total was, and Megan did not tell me what she bought.
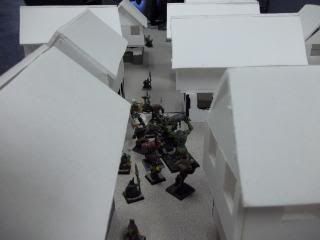
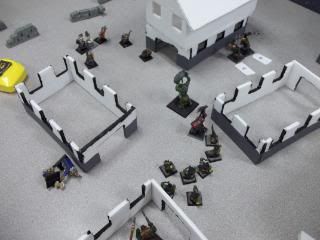
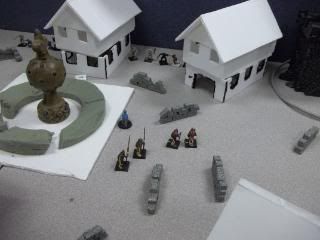
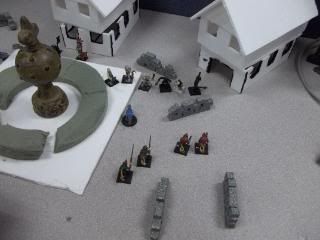
Jim Undead(WBR 149) vs. LAZ Skaven(WBR153)
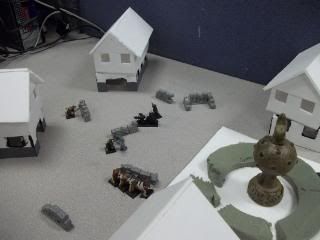
Here's our set up:
My Right Flank: That's a termagaunt standing in for a Giant Rat.
My left Flank:
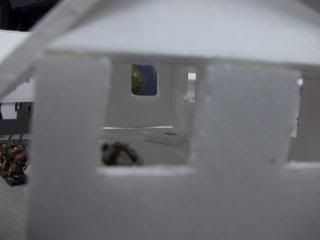
My Eshin Sorcerer in the building. I love this shot, its kinda arty.
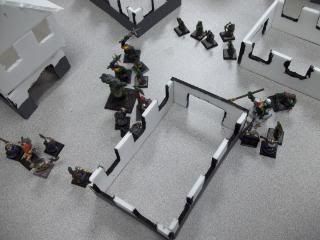
Turn 1: My advance
Jim Advance
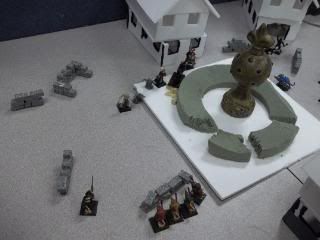
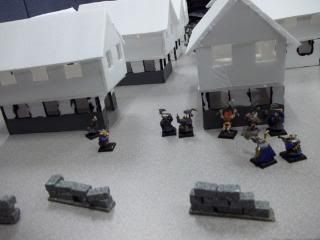
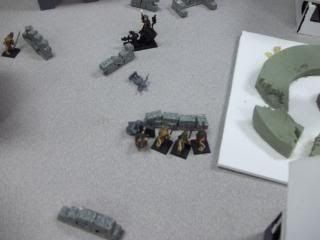
Turn 2: My ill thought out charge. I didn't take anyone out.
Jim's counter charge, led by the Vampire.
Jim's advance on my other flank.
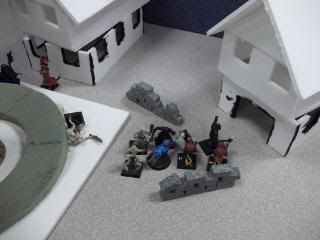
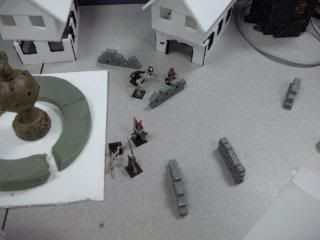
This is where we ended up on the left flank.
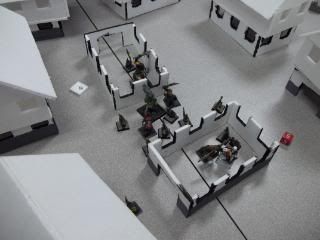
This is where we ended up on the right flank.
1. Who Killed Who:
Eshin Sorceror got wyrdstone
Black Skaven I: killed a dreg
Vampire got wyrdstone
ballless dreg killed BS II
Vampire killed verminkin
2. Injury Results
Undead all survive
1 verminkin dead
black skaven full recovery
3. XP gained.
Vampire: +4 (total 37: +1 WS)
Necro: +1 (total 14: new skill)
Painted: +1 (total 7)
With Ball: +1 (total 7)
Ballless: +2 (total 8- +1 str)
Super Ghoul: +1 (total 6- +1 str)
ghoul group: +1
eshin sorceror: +2 (17skill)
BS1: +1 (total 18)
BS 2: +2 (21 skill)
Pierced Tail: +1 (3)
Verminkin A: 8
Verminkin B: 3
4. Exploration results
S: 444: fletcher: 3 wyrdstone, 3 Bows. (60 +15 GC)
U: 66521: 4 wyrdstone, (ruined hovels 5 gc), (60 GC)
5. Recruiting:
Jim XP pool: 6
LAZ XP pool: 11
6. New standings.
Jim: 160
LAZ: 179
Well, its the first week to play again since we have been busy at work lately. Fortuitously we were able to clear off a slightly larger space then what we have been using, so it makes things a bit more interesting. Not that we pariticularly used that extra space. It was a pretty good couple of games, even though halfway through my game the computer I was using Blue Screen of Deathed me, so I lost all the notes I had for my game. Please forgive the state of these notes, they are just what I jotted down during the match. As for the pics, this time I'm not busting out of the borders here, but I'm not too satisfied with the size. This time I'm thinking that its too small.
Tom Dwarves(WBR 131) vs. Megan Orcs & Goblins(WBR 200)
Megan's O&G Setup.

Tom's Dwarf Setup.

OT1:
Two gobs fail animosity, one of them stuns a 3rd gob.


DT1:
Move forward

OT2:
Two gobs fail animosity, but do nothing. Move forward

DT2:
Move Forward

OT3:
One gobs fails animosity and WAAGH's. Another goblins grabs a wyrdstone counter.
DT3:
Dwarfs move forward. Engineer fires and hits and wounds goblin, who is knocked down.
OT4:
One gob fails animosity and does nothing. O&G move and fortify themselves.

DT4:
Dwarves move up. Engineer fires and takes out gobbo.
OT5:
One fails animosity does nothing, Big Un 1 grabs wyrdstone.

DT5:
Move, engineer shoots and misses
OT6:
Passed all animosity, one with spear charges Dwarf Noble, one with spear charges thunderer. Shooting: 3 gob archers miss. CC: Gob 1 misses, Dwarf noble criticals and stuns gob. thunderer hits and knocks down.

DT6:
Bit of movement. Shooting. THunderer kills OB, CC: Noble curb stomps gob. Thunderer gets over toughness.
OT7:
OB fails animosity and stands, move forward, shooting: shaman spell suceeds for the very first time on thunderer, 2 fail, 1 hits, and knocks down. one gobbo crits on noble takes him to stunned.

DT7:
recovery, mov up, Shooting: thunderer miss via lucky charm, engineer misses troll

OT8:
charges, Dwarf Noble survives with his 3+ gromril armor and shield, boss takes out already wounded dude, troll knocks down other guy.

DT8:
movement, charges. Shooting: Thunderer shoots big un, does not wound. CC: thunderer vs. gobo does nothing, noble vs shaman nothing.

OT9:
gob that was going to charge failed animosity and fought another gob. troll takes out beardling.
DT10:
orange hair takes out orc boss

OT10
Shaman takes out noble
orange hair takes out gob
II takes out thunderer
I gets a curb stomp
DT10:
needs rout check fails rout.
The Quick Score Sheet:
1. Who Killed Who:
Engineer kills gobbo
Gobbo grabs wyrdstone
Big Un 1 grabs wyrdstone
Noble curb stomps gob
Thunderer kills gob
orange hair takes out orc boss
Shaman takes out noble
orange hair takes out gob
Big Un II takes out thunderer
Big Un I gets a curb stomp
2. Injury Results
Dwarf Noble: snake eyes dead
beardling with hammer is dead
Orc Cheif: full recovery
orc boy dead
2 gobs with spears dead.
3. XP gained.
tom: +2
engineer: 3 (20 total: +1 str)
orange hair: +4 (17 total: 2 rolls, 1 +1 attack, skill)
white hair +2 (15 +1 ws)
thunderers: (that lad's got talent, skill, the other +1WS)
Chieftain: 3: (36: skill)
Shaman: 2 (15: +1 Attack)
BU1: 3 (26)
BU2: 2 (24- skill)
OBS: +1 Ld
4. Exploration results
4432: +1 wyrd dwarf = total of 4 wyrdstone (straggler, get +1 die on next exploration phase)
33224: double 2 shop (6 GC), 3 wyrdstones
5. Recruiting
Tom: 2 XP: thunderer with handgun.
Megan: 7 available
6. New standings.
Tom:
Megan: 203
Tom left early, so I didn't figure out what the new total was, and Megan did not tell me what she bought.
Jim Undead(WBR 149) vs. LAZ Skaven(WBR153)
Here's our set up:

My Right Flank: That's a termagaunt standing in for a Giant Rat.

My left Flank:

My Eshin Sorcerer in the building. I love this shot, its kinda arty.

Turn 1: My advance


Jim Advance


Turn 2: My ill thought out charge. I didn't take anyone out.

Jim's counter charge, led by the Vampire.

Jim's advance on my other flank.

This is where we ended up on the left flank.

This is where we ended up on the right flank.

1. Who Killed Who:
Eshin Sorceror got wyrdstone
Black Skaven I: killed a dreg
Vampire got wyrdstone
ballless dreg killed BS II
Vampire killed verminkin
2. Injury Results
Undead all survive
1 verminkin dead
black skaven full recovery
3. XP gained.
Vampire: +4 (total 37: +1 WS)
Necro: +1 (total 14: new skill)
Painted: +1 (total 7)
With Ball: +1 (total 7)
Ballless: +2 (total 8- +1 str)
Super Ghoul: +1 (total 6- +1 str)
ghoul group: +1
eshin sorceror: +2 (17skill)
BS1: +1 (total 18)
BS 2: +2 (21 skill)
Pierced Tail: +1 (3)
Verminkin A: 8
Verminkin B: 3
4. Exploration results
S: 444: fletcher: 3 wyrdstone, 3 Bows. (60 +15 GC)
U: 66521: 4 wyrdstone, (ruined hovels 5 gc), (60 GC)
5. Recruiting:
Jim XP pool: 6
LAZ XP pool: 11
6. New standings.
Jim: 160
LAZ: 179
Friday, July 22, 2011
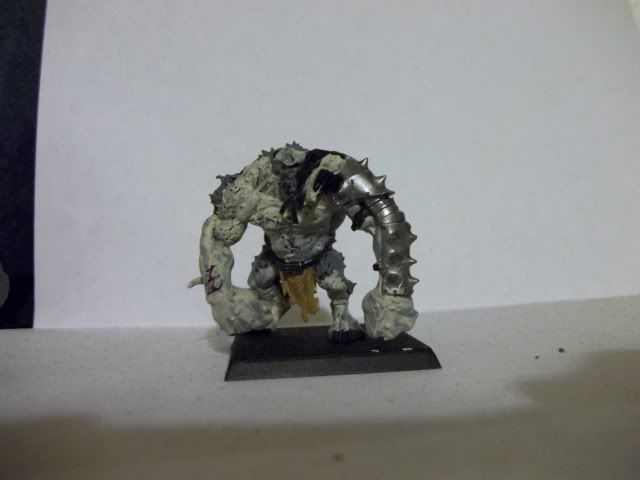
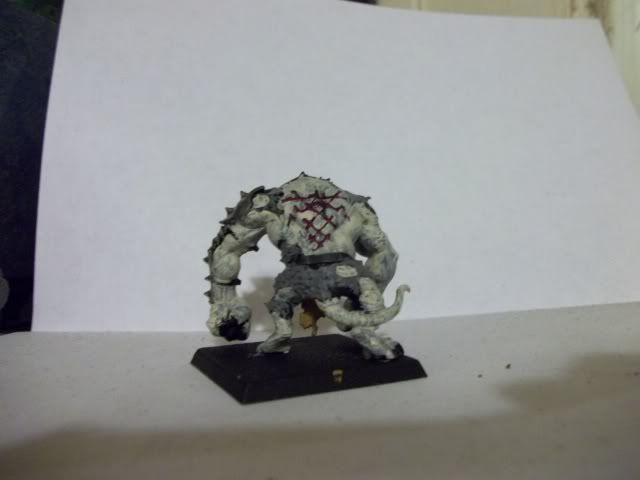
Hobby: Rat Ogre
I am trying to put more Rats on the table. So here's the Rat Ogre. From step 1 to finish.
Step 1: Base Coats
Step Two: Adding fleshtones and base fur color, with initial washes.
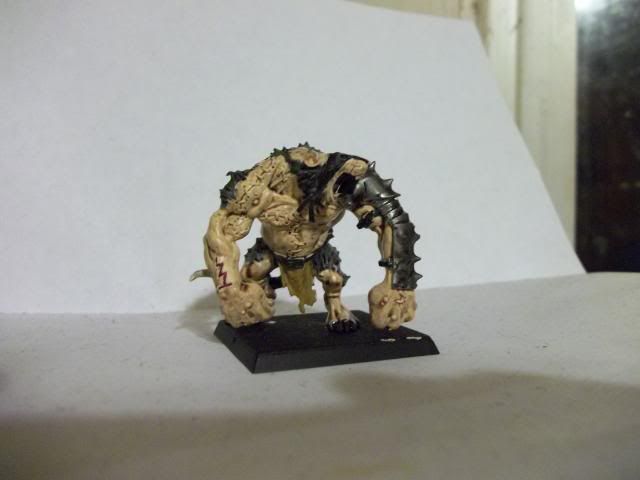
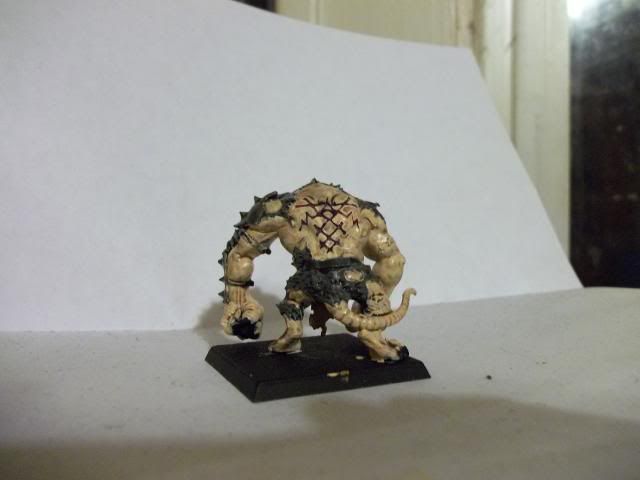
Step Three: Drybrush of Fur
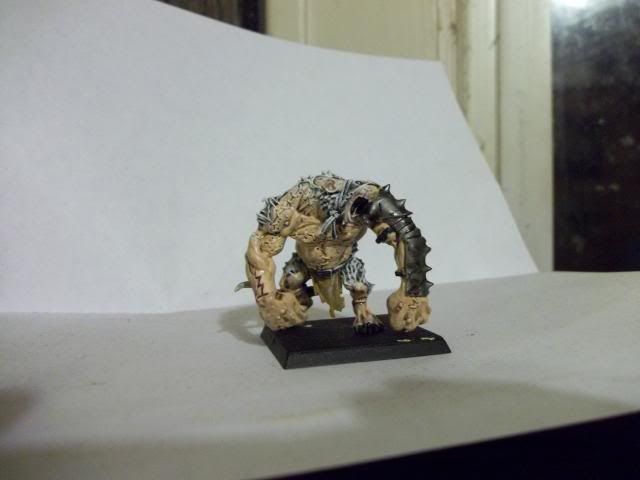
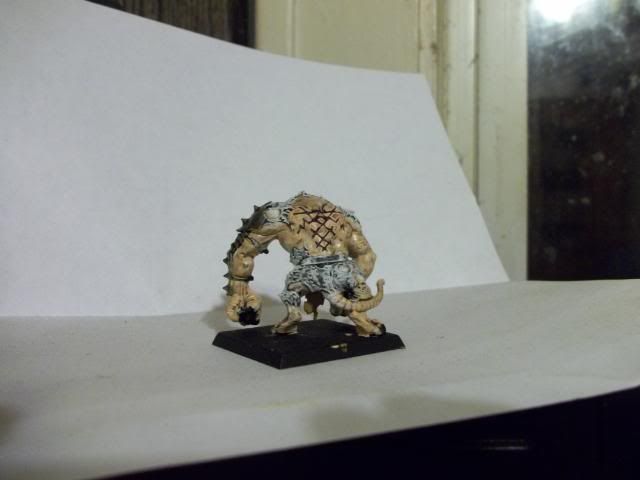
Step Four: Final Details
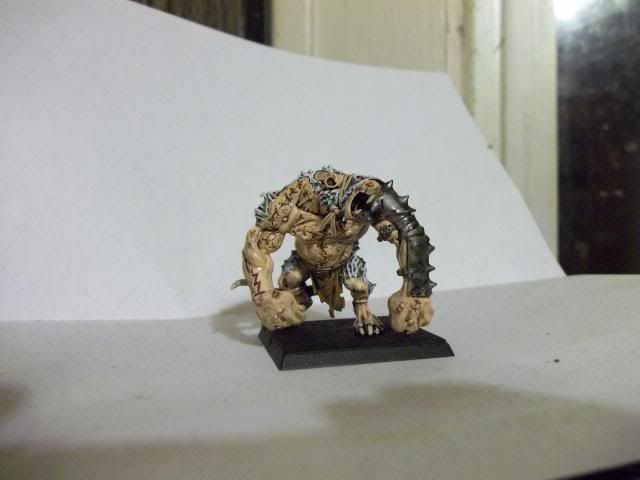

Step Five: Pinky and the Brain together for the first time. I'm not entirely enthused over how the white fur appeared over the larger model. I'm not sure what the term is, but it seems like it is washed out or doesn't pop as much. Ah, well.

Yet again, it seems like I went beyond the border. I'm not sure how to resize the pics when posting them. I'm still learning. I may have to upload them to photobucket at a different size. So I might have to start that again.
Step 1: Base Coats


Step Two: Adding fleshtones and base fur color, with initial washes.


Step Three: Drybrush of Fur


Step Four: Final Details


Step Five: Pinky and the Brain together for the first time. I'm not entirely enthused over how the white fur appeared over the larger model. I'm not sure what the term is, but it seems like it is washed out or doesn't pop as much. Ah, well.

Yet again, it seems like I went beyond the border. I'm not sure how to resize the pics when posting them. I'm still learning. I may have to upload them to photobucket at a different size. So I might have to start that again.
Tuesday, July 19, 2011
Public Service Announcement
After the last few days, you might have noticed that I've slowed on my blog posts. There's two real reasons for that. One, I'm almost out of the stuff that I've written elsewhere. Second I want to settle into a groove so that I don't get burned out. Which brings me to today's post.
I want to kinda state what I want to do with scheduling in the foreseeable future.
Monday: Monday Night Mordheim. Really the reason I am writing this blog. A bit of tactics, a bit of other stuff. Mainly pulled from what I am writing on Astro, but it is now going to be more focused outside of the realms of what I would do on a purely 40K forum.
Wednesday/Thursday: I want to post some painty stuff. Or converty stuff. Or terrainy stuff. Or other hobby stuff with superfluously added y. I'm not nailing this down on a specific day. There's a reason for that. I'm not sure when I'll have time to hobby in any given week. Or I might not get any hobby done, then I'll not be posting anything!
Saturday: Saturday is game day at work. So after I get the battle report written up, I'll post it up here. And elsewhere, but here is the priority, and gets them earlier. I'm hoping that the bat reps will bring me some more followers. However, I'm not sure how much longer this current campaign will last. Probably until September. Then I'll have to figure out what to do then.
Monday, July 18, 2011
Monday Night Mordheim: FTL- For the Loss!

Monday Night Mordheim: FTL! For the Loss!
Hello, and welcome back to Monday Night Mordheim. Today I want to talk about something that is not just a good idea, but sometimes the best idea. Losing on purpose.
"Losing is for losers!" I can here you say and yes, yes it is. That being said there are times when you want to lose. You may plan to lose. Sometimes losing the way you want is the key to overall victory.
People tend to forget that. They get caught up in the heat of battle, and end up risking valuable War Band members or other hard to replace resources. That is the way of defeat. You lose more then one or two expensive models, then you have a hard time replacing them, and that in turn leads to losing more games when you don't want to.
Which is a very long winded way of getting to my initial point. The voluntary Rout is your best friend. Even the hardest, most killy, leadership ignoring guys aren't stupid. Cut and run sometimes, and you might get enough to salvage a bad match.
The first thing to think about a Voluntary Rout is that it is NOT a viable long term goal. You won't get anywhere if you lose EVERY game. What the Voluntary Rout is, is a way to lose while not getting slaughtered. You can Voluntary Rout at the start of any of your turns after you have lost two warband members. However, when to take the Voluntary Rout and when to take your chances is really the key to determining what you want to do.
When Voluntary Routing is a good idea;
* If you have lost more then one hero, and you have others at risk. Heroes get you income during exploration. If it starts going south for you, head for the hills to regroup.
*Out numbered, out gunned, out matched. If your opponents warband is twice the size yours is, or they have a warband rating high enough to give you an underdog rating, then you might want to cut and run. The basic rule of thumb in this situation is to try to cause as much damage to your opponent as they will to you. However, if that seems to be going poorly, run away! If your heroes survive, you still get extra experience points and can still do the exploration phase.
*There are no more henchmen. I'm sorry, but if ALL of your henchmen are gone, and you haven't failed a Rout check, you really should Voluntarily do so, especially if your opponent still has a healthy amount of henchmen.
*There is nothing at stake.
*You play dwarfs, then you should ALWAYS rout. 'Cause I hates them beardy so-and-so's. Chew on that bit of Tactica Tommy-boy!
When it is a Bad Idea to Voluntarily Rout:
*There is something on the line. Many scenarios involve an extra bonus. Extra pieces of Wyrdstone or some sort of treasure. This is Especially true of the Wyrdstone. Those extra pieces of Wyrdstone can often make up the difference from losing a roll in the exploration phase.
*When your opponent is around the same warband rating as you. This especially holds true if you have a particularly potent hero. You might want to stick around even if you are losing to inflict more casualities. Any model lost during the Injury Results phase means something that your opponent needs to replace rather then enhance. Sometimes sacrificing one really good unit can cause huge amounts of delay and consternation to your opponent over the long term of the campaign.
*If your opponent is already rolling Rout Checks. You are already starting to win, don't abandon hope now! This is the crunch. There is a chance that the match will come down to the leadership roll, and believe me, that's unpredictable.
These are some simple things to keep in mind when deciding to Voluntarily Rout. It may seem simple, but it is complex. In some ways you need to weigh the cost of winning against the consequences of losing. Sometimes the cost of victory is just too high for a particular skirmish, and you are better off running away and bidding your time.
Thursday, July 14, 2011
From the Pit: Mathhammer Pt 2
Last time we spoke, I mentioned the superiority of ranged weaponry over melee combat. Well, now its time to investigate the flip side of that. Close Combat wins games. Going back over some of the stuff from last time if you remember that even the worst WS can still hit the best WS on a 5+. So that means even your lowly zombie with a WS 2 can potentially hit even that super evolved Possessed model.
Therein lines the rub, though. Everyone can potentially hit everyone else with equal ease. So what makes the difference? Well, mainly its choosing the right tool for the right job. And when picking the right tool, there are a few things to consider. Those are the Weapon Skill, Strength, Initiative, and lets not kid ourselves, the cost. These are really the things that make a difference.
Before we get into those, and how they effect close combat I want to take a moment to mention something. This is something that is completely overlooked by most wargamers, and most people that play any of GW's games. The base line model in Mordheim is the standard human. Most stats are 3, except for wounds and leadership. In 40K the baseline is the tactical marine, and everything is scaled up or down from that. Mordheim, everything is scaled from a base of 3. That makes a huge difference. It means that for almost all actions you have a 50/50 chance of succeeding. That's our center point.
With three being our center point that's where the WS, Strength, and Initiative come into play. Anything that is under three is low, anything over three is high. Three is the magic number, and it doesn't make a difference. With a three in any score, you concentrate on the other stats instead of the one that is a three, and if all of them are three, then just do what you like. There are things that you need to consider with each other. I could make a whole spread sheet of different combinations, but that would take awhile, so I am going to highlight each one.
Low WS: These guys are your filler. They only have a 33% chance of hitting, so in most cases you want to avoid things that don't improve your chances of causing a wound, because you might not get a chance later.
High WS: These are the mainstay of your close combat troops. These are the guys that you want to give weapons with special abilities to. The axe, club, are excellent in these hands. Especially the club, which can help get a stunned result.
Low Strength: With a low strength you almost have to take some sort of strength increasing weapon, fortuitously there are very few things that have a strength lower then three.
High Strength: While it is tempting to give these guys weapons that increase thier strength to really high amounts, it isn't worth it. Save yourself some money, and go with weapons like halberds and morning stars. These increase your strength by one, and a five strength wounds the most common toughness on a 2+, with an armor modifier of -2 as well.
Low Initiative: There's two ways around this. You can take a spear which always hits first (except against other spears, or special skills), however that only effects the first round. The other thing to do is to take a double handed weapon, since you will be hitting last anyway, you might as well make that hit a big hit.
High Initiative: These guys are gods in Mordheim. The only thing you want to avoid totally is the double handed weapon. Speed is their strength, so don't turn it into a weakness.
So those are the main things to keep in mind, because they effect almost every hit. However, there are a few things lesser things that you want to keep in mind as well. They effect each combat, but are of lesser importance. Those are handedness, cost, and something else to be determined.
Handedness: This seems kind of obvious, but it can make or break a model. A single handed weapon can allow you take a shield, buckler, or a second single handed weapon for a bonus attack. The two handed weapons generally have a better ability or a strength increase, but they don't allow you to use a second weapon, shield, or buckler in close combat. You have to weigh the benefits of two handedness special abilities against the defense or extra attack a one handed weapon can give you.
Cost: Again, seemingly obvious, but it makes a big difference, especially at different points in the game. A low cost weapon, like a club/hammer/mace or axe are great for the beginning when you want to put boots on the ground or you are playing a horde warband, but give very few extra abilities. The mid point weapons are often what I like to call the game makers. Mid point weapons, like the sword, halbred, or spear have almost no drawbacks and a pretty good ability. High cost weapons like flails, morningstars, and double handed weapons have huge advantages, but also have huge drawbacks.
These are the things that make a difference in Mordheim, WS, Strength, Iniative, Handedness, and cost. There is a lot more to think about when equipping your models with close combat weapons then with ranged weapons, but I hope I gave you a bit more food for thought with these.
Wednesday, July 13, 2011
From the Pit: Mathhammer Pt1
I saw another article a today on International House of Paincakes about the mathematical side of ballistics in 40K. A while back I had done the same for Mordheim. Only with less maths, and more of my offbeat commentary. So I figured I'd post my version up for your enjoyment!
From the Pit:
Hello again, it’s time to talk about everyone's favorite Fantasy Skirmish game, Mordheim. I've really been investigating it lately to bring more stuff to you. Fresh stuff, stuff not everyone has thought about over and over again. I've really hit onto something this time though.
Close combat is a mug's game.
Do I have your attention now? I thought so. I'm not saying that close combat is not an important part of Mordheim, because it is, but comparatively speaking, it’s just not as powerful. When dealing with close combat, the difference is made not in weapon skill, but with what skills, abilities, and other stats that make the difference. On the other hand, Ballistic skill is not as dependent on the skills.
Let me break it down for you, in the most extreme case that I can. The highest weapon skill that any model in Mordheim can get is 8 (Vampire and Possessed Respectively). This is pretty high, however, if that person with a WS of 8 is in combat with someone with a WS of 1, he only needs to roll a 3 to hit, while the person with the WS of 1 needs to roll a 5 to hit him back! See, now that is interesting. However, normally you need a five to hit WS 8, except that the table changes. Once you get WS 4 or better you only need to roll a 4 to hit any WS higher available in the game.
So what exactly does a higher WS do for you? Well, it makes any WS lower then your own able to be hit on a 3+ instead of a 4+. Sounds good, right? Not so much, especially after WS 4. The vast majority of models in Mordheim fall between 2 to 4 WS. Most of the time that extra point or so in WS just goes to waste. Once you have WS 4, you hit everything possible in the game on a 4+, and anything lower at a 3+.
Close combat is decided more by what abilities your particular weapons have, the initiative, the number of attacks, and the strength of the damage! So a lot more goes into close combat, then missile fire...
Ranged Combat in Mordheim is dominant, and for one reason, Ballistic Skill. Unlike Weapon Skill, Ballistic skill is not a comparison skill. The best possible BS you can have in Mordheim is 7 for the elves, but most everyone else tops out at 6. This is important.
The easy way to figure out what you need to hit in Mordheim in ranged combat, is to subtract your BS from 7. Whatever the result is that is how much you need to roll over to get. Before any modifiers for cover, distance, or anything else, the lowest possible to hit roll you need is zero. A brief aside that most people don't realize is that Mordheim shooting does not have an 'always miss on a roll of 1' rule! So if you have a maxed out BS, you can almost always hit!
So let's stop for a moment and compare. The BEST weapon skill you can have has a minimum to hit roll of 3, while the BEST ballistic skill you can have has a minimum to hit roll of zero. Let's break out the mathhammer here.
Under the best of circumstances, WS 8 vs. WS 1, you have a 66.5% chance of scoring a hit.
Under the best of circumstances a BS 7 that did not move, firing at a large target not in cover at half range, you have a 116.5% chance of hitting
Conversely under the worse circumstances WS 8 vs WS 8, you have 50% chance of scoring a hit.
Under the worst circumstances BS 7, having moved, firing at a normal sized target in cover at max range, you have a 66.5% chance of hitting.
Wow. So under best circumstances, you have almost 50% better chance of scoring a hit with a ranged weapon then in close combat. Under the worst circumstances, that edge drops to a mere 16%. What makes the difference is that WS is almost never modified, BS is almost always modified in one way or another. Now, granted at higher levels that is taken to extreme. At lower levels, it is possible to take your BS to a level where it is impossible to get a hit. For instance a BS 1 with any modifiers you would need to roll a 7 on a d6, which we all know is impossible. However, that WS 1 trying to hit a WS 8 still has a 33% chance of hitting!
So while just mathhammering it out it would seem silly to do anything but shoot, right? Wrong. At the end of the day, both types of combat have their strengths and weaknesses, it’s just the to hit rolls that make the difference! I think that next time I'll work a bit more with close combat, proving that it wins games.
Tuesday, July 12, 2011
From the Pit:
The Low, Low, Low Price of Mordheim.
One of the reasons that I am always suggesting Mordheim to people is the low cost of playing it. All of the official rules are free, and a few of the warbands cost the price of a single unit in WHFB or 40K. Recently, I put a challenge out to myself, I wanted to figure out exactly HOW cheap Mordheim was. Since I live in the States, I did everything in dollars, so you can probably figure out how much it costs in your own country.
Now, there's a lot of things going around about how much a standard army is for WHFB or 40K, and it seems to be upwards around five-six hundred dollars, and sometimes more. However, the MOST expensive of the Mordheim warbands is the low, low price of $164.50, and in that price, you end up with a lot of models you can't even use!
So what I want to do for you now is break down every Official Mordheim warband by what is required, and what the boxes come with. Now, I do want to put a little caveat in there. You can't take everything in a warband, BUT what I figured out is if you wanted to have all the options from the very beginning. So you might be the type of player who NEVER uses a certain type of model, but I'm putting it out there for you.
So without further ado, I present the break down.
1. Mercenaries: Mercenaries comprises of Reiklanders, Middenheimers, and Marienburgers. Are all really well rounded, and each has its own strengths.
Requires: 1 Captain, 2 Champions, 2 Young Bloods, 7 marksmen, 5 swordsmen, and up to 14 warriors.
Official Mordheim Box: There isn't one. There are a few captains and that are specific for each type of Merc, but they really aren't necessary.
Individually: This is where it gets dirt cheap. You can buy a single box of Empire Militia for $35, and technically you have everything you need. So if you wanted EVERYTHING, you could just buy two Empire Militias. However, you can also get Empire Archers, Empire Captain, Empire State Troops, Empire State Handgunners/Crossbowmen, but that's only if you want to really make it unique.
2. Cult of The Possessed: The bad guys of Mordheim, or one of them at least. They are a fun warband, but a bit difficult.
Requires: 1 Magister, 2 Mutants, 2 Possessed, 5 Darksouls, 3 Beastmen, and up to 14 brethern.
Official Mordheim Box: Comes with 1 Magister, 1 Possessed, 4 Brethren, and 1 Darksoul. All for $41.25. So you get about half of what you need. So if you buy two of them, you get one left over Magister, and you still don't have a few more models you need to get!
Individually: I had to work a bit to get this one to work, but here you go. 1 Magister (Chaos Sorceror 13.25) 2 Possessed (Chaos Spawn 33.00), 2 mutants, 5 Darksouls, 14 Brethern (Chaos Marauders $35), Gor Herd (24.75). Now, as for the Mutant, I would suggest using extra bits left over from the Spawn to modify some Chaos Marauders. As for the Darksouls, I would suggest using a different paint scheme. So grand total of $106.
3. Witch Hunters: Ah, Sigmar's elite inquisitors. A fun little warband, but one of the harder ones to get together. Especially if you want all the warhounds.
Requires: 1 Witch Hunter Captain, 3 Witch Hunters, 1 Warrior Priest, 5 Flagellants, 5 Warhounds, up to 11 zealots.
Official Mordheim Box: 1 Witch Hunter Captain, 1 Witch Hunter, 2 Flagellants, 3 zealots, 1 warhound for 41.25. So two of them, you end up with one extra captain, but I would use him as a regular witch hunter, and you have a whole warband for $82.50, but you are STILL needing a warrior priest.
Indivually: Witch Hunter Captain, 3 Witch Hunters (10.75 each), 1 Warrior Priest (11.50), 5 Flagellants (10 for 29.00), 11 Zealots (Empire State Troops 25 or Empire Militia 35), 5 warhounds (5 wolves for 15). A grand total of $123.50.
4.Sisters of Sigmar: A great and really unique warband, and probably the only really GOOD warband.
Requires: 1 Matriarch, 3 Sister Superiors, 1 Augur, 10 novices, and up to 14 Sigmarite Sisters.
Official Mordheim Box: Matriarch, Sister Superior, 4 Sisters, 2 novices 41.25. Technically, any sister could be a novice, a Sigmarite Sister, or a Sister Superior. This is the ONLY official warband I would suggest getting multiples of the official box. So no individuals here!
5. The Undead: The Vampire Counts of Mordheim, or to be more precise and fluffy, the agents of the Vampire Counts. Kind of a frustrating warband, since Dregs are only available in the official box.
Requires: 1 Vampire, 1 Necromancer, 3 Dregs, 5 dire wolves, up to 14 ghouls, and up to 14 zombies.
Official Mordheim Box: 1 Vampire, 1 Necromancer, 2 Dregs, 4 metal zombies $40.00. I really do not recommend buying this box, you get too many doubles and too many bad henchmen. Eight Metal zombies is a bit much, and you still don't have enough to get a full warband.
Individually: 1 Vampire (15.25 OR 13.25 Mordheim single), 1 Necromancer 13.25, 3 Dregs (?), 14 zombies (20 for 35), 14 ghouls (10 for 24.75), 5 Dire Wolves (10 for 24.75). A grand total of 137.75. Now as for the Dregs, I would suggest that you use zombies, only flesh colored instead of rotting.
6. Skaven: The true masters of Mordheim, they are really made for Mordheim, a bunch of extra skills.
Requires: 1 Assassin Adept, 2 Black Skaven, 1 Sorcerer, 2 Night Runners, 1 Rat Ogre, up to 19 Giant Rats, up to 19 Verminkin.
Official Mordheim Box: The Warp Hunters box, is a rip off. It's $29.75 for 10 models. What it actually is half of a Night Runners box, which is $35. Don't buy it. However, a Night Runners box is twenty models, and it is all you really need. You can actually convert everything but Giant Rats and Rat Ogre from it.
Individually: Actually, I would suggest buying Isle of Blood for $99, and you would have lots left over. However, if that is no longer available, here's the list; Skaven Assassin (12.25), Grey Seer (15), Clan Rats or Night Runners (35), Rat Ogres (comes with 3 and 6 giant rats (40), 4 Sets of Giant Rats (40). Grand total of $142.25.
7. Beastmen Raiders: From the Empire In Flames expansion, these are a powerful warband.
Requires: 1 Bestman Chieftan, 1 Beastman Shaman, 2 Bestigors, 1 Centigor, 5 Gors, 1 Minotaur, up to 14 Ungors, 5 chaos Warhounds.
Official Mordheim Box: 1 Champion, 1 Shaman, 3 Gors, and 3 Ungor for 41.25. While this would be a decent start to a warband, even doubling it doesn't really pay for itself.
Individual: 1 Chief (15), 1 Bray Shaman (13.25), 1 centigor (12.25), Gor Herd (good for Gors and Bestigors 24.75), 5 chaos hounds (10 for 24.75), Ungor Herd x2 (24.75), 1 minotaur (25 mordheim single) A total of $164.50.
8. Carnival of Chaos: Another Empire In Flames expansion warband, it is truly unique.
Requires: 1 Carnival Master, 2 Brutes, 2 Tainted Ones, 2 Plague Bearers, up to 14 Nurglings, up to 14 Brethren, 1 Plague Cart.
Official Mordheim Box: 1 Carnival Master, 1 Brute, 1 Plague Bearer, 4 Brethren, 1 Jester (tainted one), for $41.25. This is actually not a bad deal, two of them and you've filled your hero choices, have the max number of plague bearers, and after you drop your duplicate Carnival Master, you are at the max number of the warband.
Individually: Ok, I lied, this is the only other warband that I would suggest buying multiples of. Add in the $50 plague cart, and you have a grand total of 132.50. If you wanted to get all the nurglings as well, you would add single package of nurglings for 17.50. That would take you up to $150.
9. Dwarf Treasure Hunters: Another expansion warband, but it is still available on the website.
Requires: 1 Dwarf Noble, 1 Engineer, 2 Trollslayers, 5 thunderers, up to 11 clansmen, and up to 11 beardlings.
Official Mordheim Box: 1 Noble, 1 Engineer, 1 Trollslayer, 5 warriors for 40. Not bad, but not good enough to warrant buying two.
Indivual: 1 Noble (15), 1 Engineer (13.25) , Trollslayers (24.75 for 5), Thunderers (35), Dwarf Warriors (35). The great thing is that warriors can serve as both clansmen and beardlings. Total of $123.
Now, one thing that I would like to mention is that many of the Captains or Nobles, or even heroes can actually be made from the champions from some of the boxes. And some of the boxes don't really need multiples. For instance, a single box of ungors is 10 models, and with heroes, that's more then you need. Making a warband with just the captain and the rest henchmen is an odd way to do it, but you can if you want.
Now, there's a lot of other warbands out there as well. However, they are no longer on the website, so I didn't include them, even though there are some things that are still on the website, model wise. That's another article.
Monday, July 11, 2011
Monday Night Mordheim: Scheduling
Monday Night Mordheim: Campaign Stuff
Mordheim is a Campaign Game. There's a lot in that phrase. Running a Mordheim Campaign is a bit like being the manager of a small store. You have to make schedules, keep books, and make sure that people are showing up. There's quite a bit to it, and I want to address most of the scheduling issues here. It would be impossible to address all of them at once, but for the first bit, I want to keep it simple.
A good starting place is to give you my own personal glossary of the terms that I use through out a campaign. That way, there is no question of what I mean.
Match: A single game of Mordheim between two or more opponents.
Session: All of the matches happening in a single sitting.
Round: All of the matches happening during a single part of a campaign, often made up of multiple sessions. Generally a round consists of each player playing a match against every other player, Round Robin style.
Campaign: All of the matches happening in all of the sessions and all of the rounds that are linked together.
Ok? Got it? Good. Hopefully as I go along, I will be able to provide a bit more of an insight about them, but for now the jist of the thing should be good.
Scheduling a Round:
The key to a good Campaign is scheduling. Now, I am going to let you into a secret of mine. I use this resource constantly with Mordheim. Printyourbrackets.com. This is an amazing website. All of the brackets are free, and you can choose any type of tournament for just about any size of Campaign. I took the liberty to pull up the one I personally like the best, Round Robin.
Here's what I do. I download the bracket for a Round Robin tournament with the same number of players as I have. Then I use paint, GiMP, Photoshop, or something else to change it have my players names or War Bands instead of just the numbers.
This takes care of 90% of the work for you. The hard part of the schedule, determining who faces who, is already done. However, then you have to break it down a bit further.
Each Round Robin is one campaign round. Depending on the size of your group, often one go round where everyone faces everyone else is not enough games. You might have it go multiple rounds, each time everyone faces everyone else. I highly suggest this for smaller groups of less then 10 people. Larger groups it gets more complicated.
Scheduling a Session:
While you have the overall number of matches, and who will face who, the problem then comes up to when everyone will face their opponents. Undoubtedly this will take more then one session. The number of matches you can have depends really on two things. How many tables you have available, and how much time you have available.
Generally speaking, I find that five hours is a good amount of time for a session. Under most circumstances, its enough to get in two matches with some fooling around, terrain re-arrangement, and the post battle sequence.
So if you have five hours and three tables, you should be able to get six games in one session. However, you may have to tinker the schedule a bit so that someone doesn't have to play two games at the same time
Scheduling a Campaign:
While you might have the matches set up per session, and figure out how long each round will take, the easiest part is to determine how long the Campaign should last. The minimum I would suggest is around 15 matches per person. However, if you have more tables or more time, you might want to expand or contract that a bit. All you have to do is figure out how many rounds it would take for everyone to complete the number of matches that you eventually want everyone to play with.
Example 1: My Current Campaign:
We have 4 players, one table, and an eight hour session.
Typically we can get three games in an a session.
Each round is six matches. It takes two sessions to go through one round. At the end of the round, each person has played in 3 matches.
So if we wanted to play to just 15 matches, it would take us 5 rounds, and we would be done after 10 weeks.
Example 2: My Old Campaign:
We had eight players, three tables, and a five hour session.
We would be able to get about six games in a session.
Each round was 28 matches. It would take about five sessions to go through one round. At the end of each round, each player had been in 7 matches.
So if we wanted to play 14 matches, it would take us 2 rounds, and would would be done in roughly 10 weeks.
Saturday, July 9, 2011
Missing Matches
Well, two weeks in a row, and it looks like it will be three weeks next week that I miss my normal Mordheim game. See, I have a unique position, on Saturday the boss is out of the building, and we are just waiting for calls to come in. So we play. Usually its D&D, but right now, I've convinced some of my players to give Mordheim a try.
It works out well, except for two things. If work gets busy, that's it, no Mordheim. Gotta put food on the table and paint in the pots. Second, if someone is sick, they call off and we have to scramble to figure out what's going on.
Two weeks due to busy. Next week I have to pick up the Elder Children from Boy Scout Camp. So three weeks without Mordheim.
Which brings me to the topic on my mind. How to deal with missing matches. It is a common problem with Mordheim that doesn't necessarily come up in other games. Since Mordheim is a campaign based game, those missing games cost dearly.
There's a few problems that need to be thought about in the grand scheme of things when talking about handling a missing game or match.
Single Person Missing;
Now, from what I've been able to tell, there's really two ways to handle it.
The first is just like in Little League, the team that doesn't show up forfeits. The winner gets to roll on his exploration phase as normal, but the loser doesn't. This can be a huge advantage, since the person who gets to do the exploration phase gets all the benefits of winning, but without the potential causalities. This can cause a moderate warband, or one with cheap troops (ie Giant Rats, Zombies, etc) to expand exponentially (or is it geometrically, I get them confused). This sometime isn't a bad thing, necessarily. If the one who misses a game has a very high warband rating, and the other has a very low one, then a missing game can be a great equalizer. However, I suggest using this method sparingly, if at all. It can be done, and over the course of a campaign, it will probably happen to everyone at least once.
The other way is to re-arrange the schedule of matches. This one is often the best of the options, but sometimes harder to pull off. It takes a well defined schedule to being with, and a group that doesn't mind changing what is happening. As long as you don't let it happen too frequently it should be fine as long as everyone stays at roughly the same amount of games. In our campaign, the first week, Megan was unavailable (I think she had a longer night then expected), so we re-arranged all the matches so that she wouldn't have to play that week. However, the next week, she had to face the rest of us. Each one of us had played at least two games, and were pretty pumped up from it, but she was on the short end of the stick for the first two games. Fortuitously, Megan's Orcs & Goblins warband was up to the task and she handled herself well in all of them. However, that was just luck.
Missing An Entire Session:
My this shouldn't happen, but it does. Work gets in the way, the kids get sick, and Bill's dog bit the mailman. Sometimes you don't have enough players or time to make it worth playing. There's a real problem. The good thing is that it doesn't upset the schedule of games, or create monster warband ratings. However, missing a whole night of gaming can cause problems.
The main problem is that one missed session can lead to a second, and then well, you've already missed two, so what's a third? That's when gaming inertia sets in. Its easier to keep going if you are going, but once stopped, its hard to get going again. The main problem with gaming inertia is that it can end a campaign faster then anything else. Once gamer inertia sets in, then the often dreaded gamer ADD picks up and people want to move onto another game.
There is a solution, by no means is it an easy one. The main thing is to make them keep thinking about the game, maybe you can show them this neat blog you found dedicated to Mordheim. You have to keep the interest alive. Keep telling people about what is happening in your campaign. Let them know that you are still figuring out how you can whup their Reiklanders, or marvel at how bloody the last fight between the Possessed and the Witch Hunters was. However, just keeping their mind on the game is more then just the obvious like the above. Sometimes its more subtle. Like showing off the beautifully painted minis that you happened to have time to do, or showing them a neat little rule that can help them in their next match (much like I showed the Dwarf player that starting in the upper floor of buildings protected his thunderers against the Undead Zombies!).
So lets say you beat the dreaded gamer inertia. Then you face the other problem. People forget what is going on. This really shouldn't be an issue, but unsurprisingly it is. The main thing you need to do is keep everyone on the same page. That can be as easy as starting a blog/forum post/email list, just to keep the tallies of who beat who. It can also be as indepth as doing your own mini Town Cryer. What you want to do is keep the information spreading. Even check in with a phone call before the game to make sure that the other person is well aware of what is going on.
The last problem is sometimes getting people to come back. Even if you avoid the gaming inertia, and you keep people up to date, they might not feel like coming back. The great thing is that this is the simplest solution. Food and drink. This works especially well if you've missed a few sessions. Pizza and beer for the night brings most gamers running. If you are a bit cheaper, or a bit more chefy, a spaghetti night can be a great way to welcome back the club. Its cheap and easy, and it looks like a real meal! An hour or so to eat and enjoy each other's company and then you'll be ready to vivisect each other in no time flat!
Well, I think that I've run my mouth off enough for now. I think that I'm starting to repeat myself and my ideas. I just realized that I brought up a lot of jargon that might only apply to me, and how I structure campaigns. So I think that maybe Monday I'll do a post on that sort of thing. Tomorrow, I'll be busy, so I probably won't be posting new stuff, probably just something from the the archives. Needless to say, I've been posting at least one thing a day here, and sometimes more, but right now everything is new. Chances are that it will slow down fairly soon, right now I just want to get everything set up and ticking over before I suffer from my own gaming ADD.
My Skaven Warband
I'm not normally a Skaven player. However, with the Isle of Blood minis, I had more then enough to start a good Skaven Warband. Here's some pics of them. Right now, there's only one that isn't painted, but I'm still converting him. Hopefully, he'll be done in a few days. Depending on how much hobby time I get. I also tried taking the pics outside in natural light, which is unusual for me. I'm not sure if I got better pics, they seem much darker then normal.
Henchmen: Verminkin with Clubs
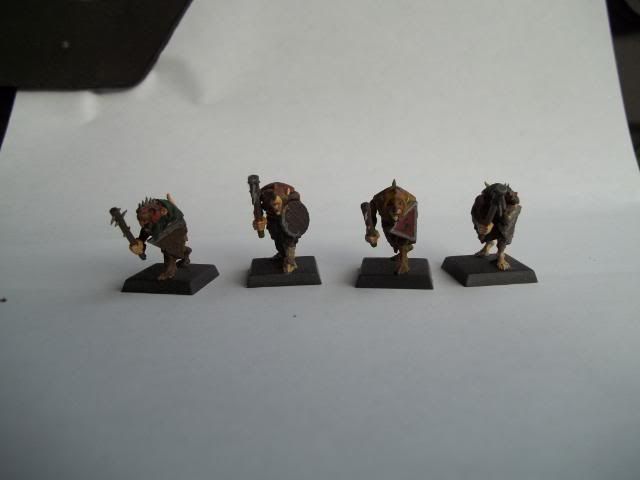
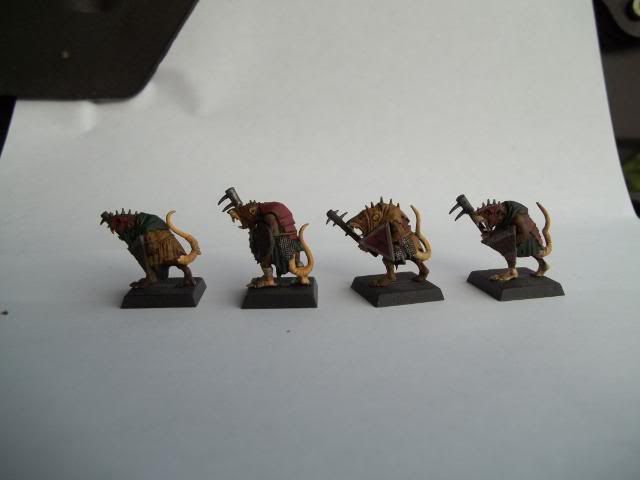
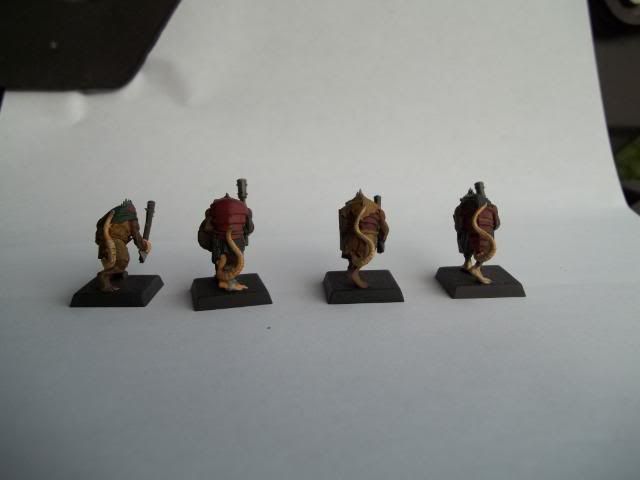
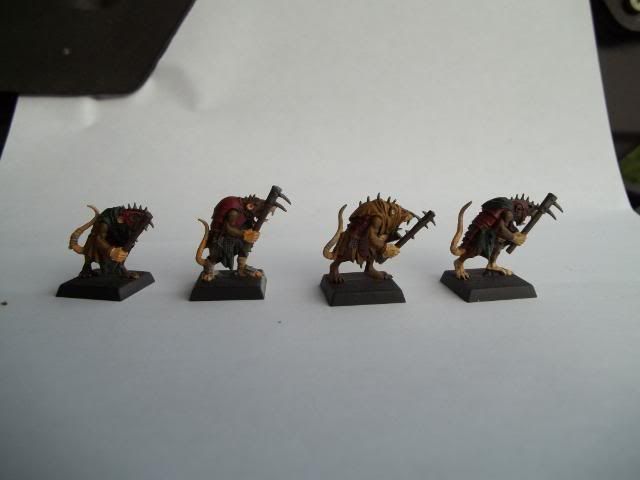
This is same as above, but I'm rather thrilled with how well he came out, and he's got a bell with a rat on it, so he gets his own entry
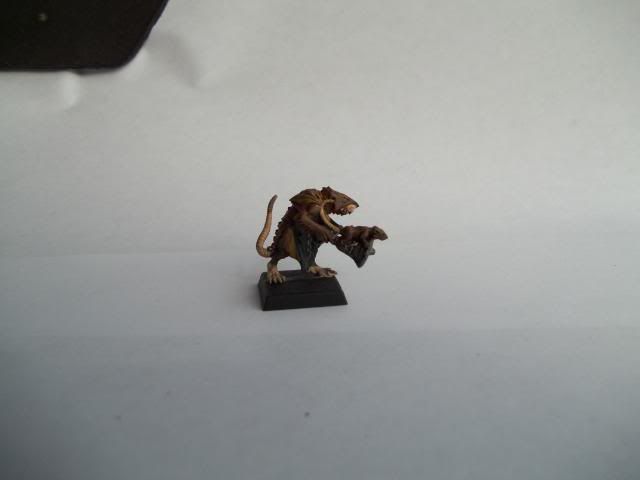
Henchmen: Verminkin with Spears
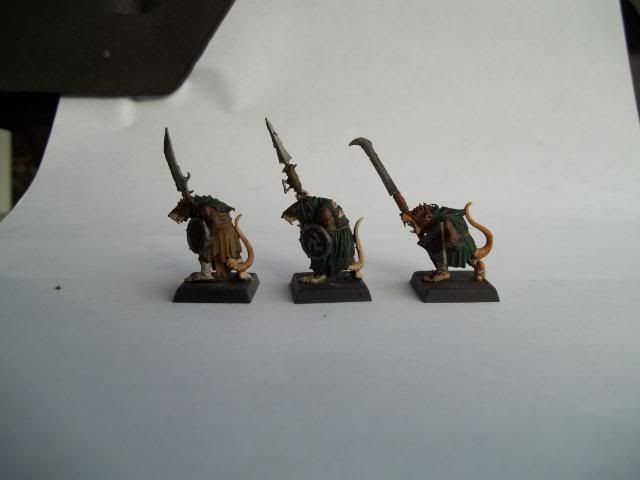
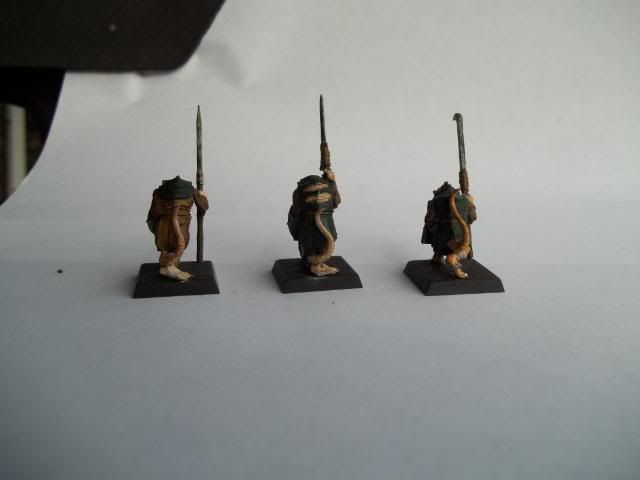
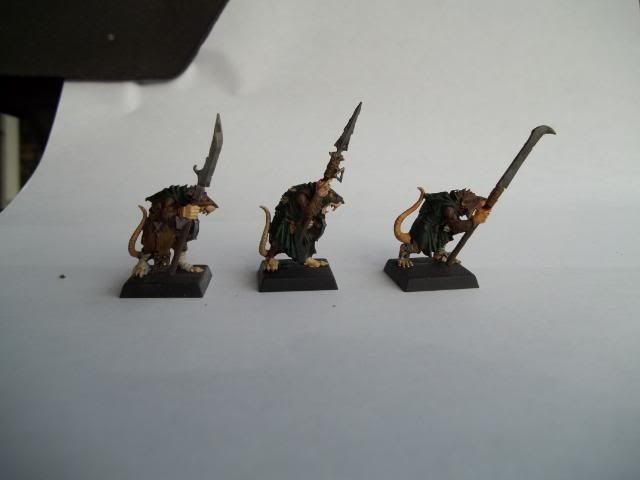
Heroes: Black Skaven x2, and Night Runner
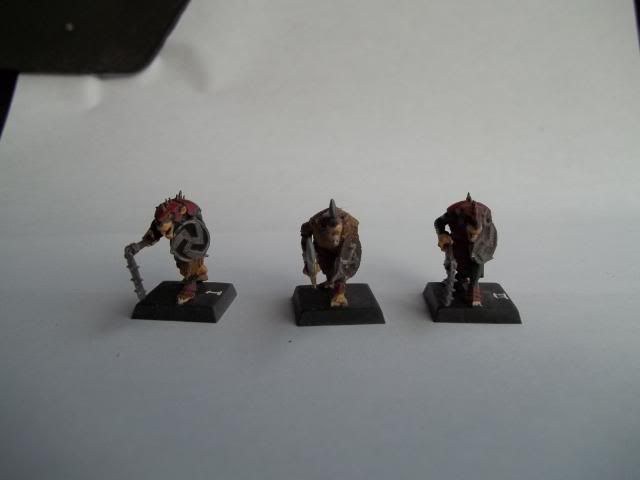
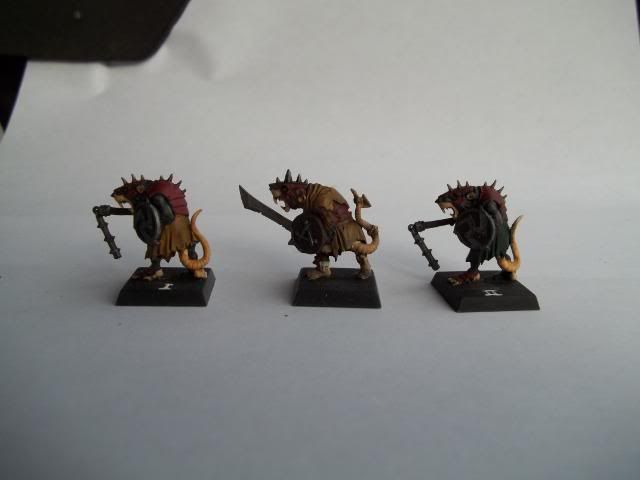
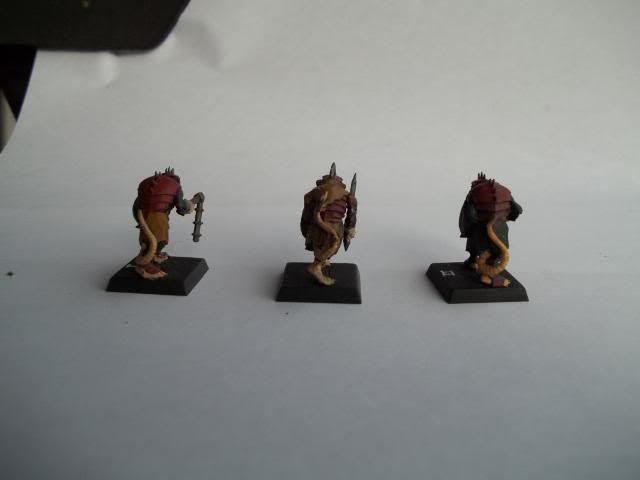
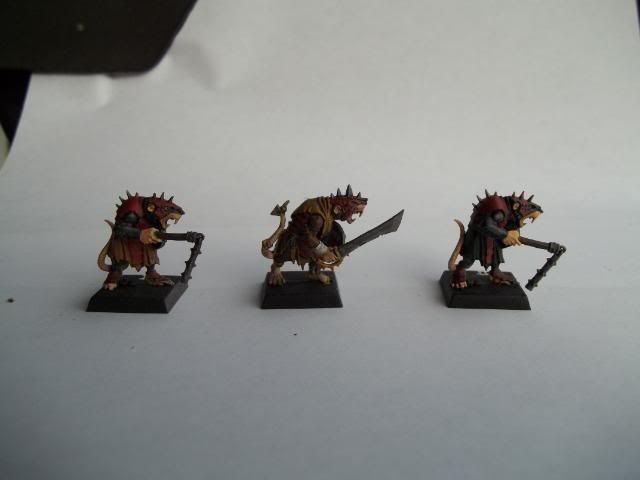
Hero: Eshin Sorceror.

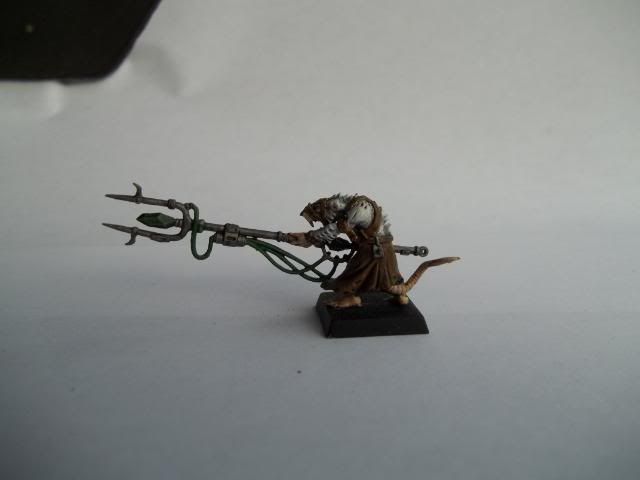
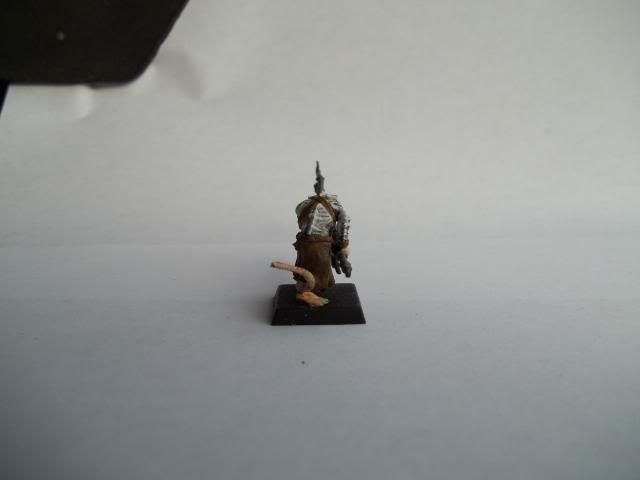
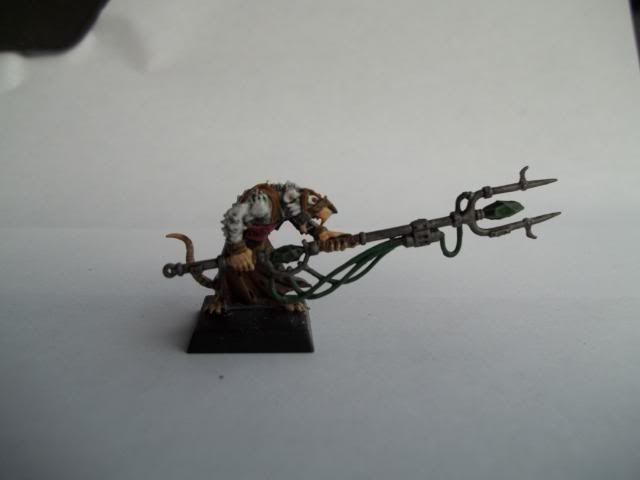
With this guy, I realize that he is normally the master moulder for the Rat Ogres, but I am going to do a Pinkie and the Brain thing with him and one of the Rat Ogres. People say that all the time, but I don't think that I've ever seen anyone actually do it. I am rather pleased with how the white scheme turned out.
Henchmen: Verminkin with Clubs


This is same as above, but I'm rather thrilled with how well he came out, and he's got a bell with a rat on it, so he gets his own entry


Henchmen: Verminkin with Spears


Heroes: Black Skaven x2, and Night Runner


Hero: Eshin Sorceror.


With this guy, I realize that he is normally the master moulder for the Rat Ogres, but I am going to do a Pinkie and the Brain thing with him and one of the Rat Ogres. People say that all the time, but I don't think that I've ever seen anyone actually do it. I am rather pleased with how the white scheme turned out.
Subscribe to:
Posts (Atom)